Housing & O-ring Maintenance
 Underwater Camera Floods: Avoiding the High Water Mark
No subject scares underwater photographers more than having an expensive housed camera turn into an aquarium. Even a bit of water can turn electronics into a corroded mess.
Here are a few general tips on maintenance that should help you avoid finding Nemo in your housing:
1) Read the manufacturer’s instructions. Please carefully read through it. Housings all vary in care and feeding. For example, housings all have different depth ratings, or have varying ways of adding a sync cord. Some have all of the controls, but many have fewer housing controls than on the camera, with some controls doing multiple actions. Some o-rings are not removable but need to be wiped off. Some housings have controls that are user-serviceable, some aren't. Read the manual to find out.
2) O-rings are probably the most important and miss-serviced parts.
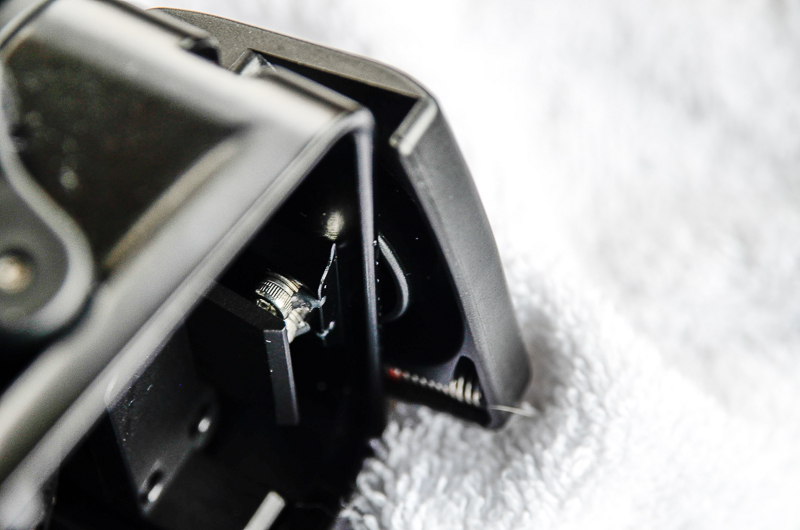
In addition to the large, noticeable o-ring on the back cover, every control has one or two, as well as the ports, and strobe or other bulkheads. Some are black, some are blue or grey, most should be serviced, but some should not.
If you don’t need to service an o-ring, don’t. A sealed o-ring will remain so unless disturbed, such as cleaning. A good example is a port: there is no need to service a port o-ring between dives if it is not removed or changed.
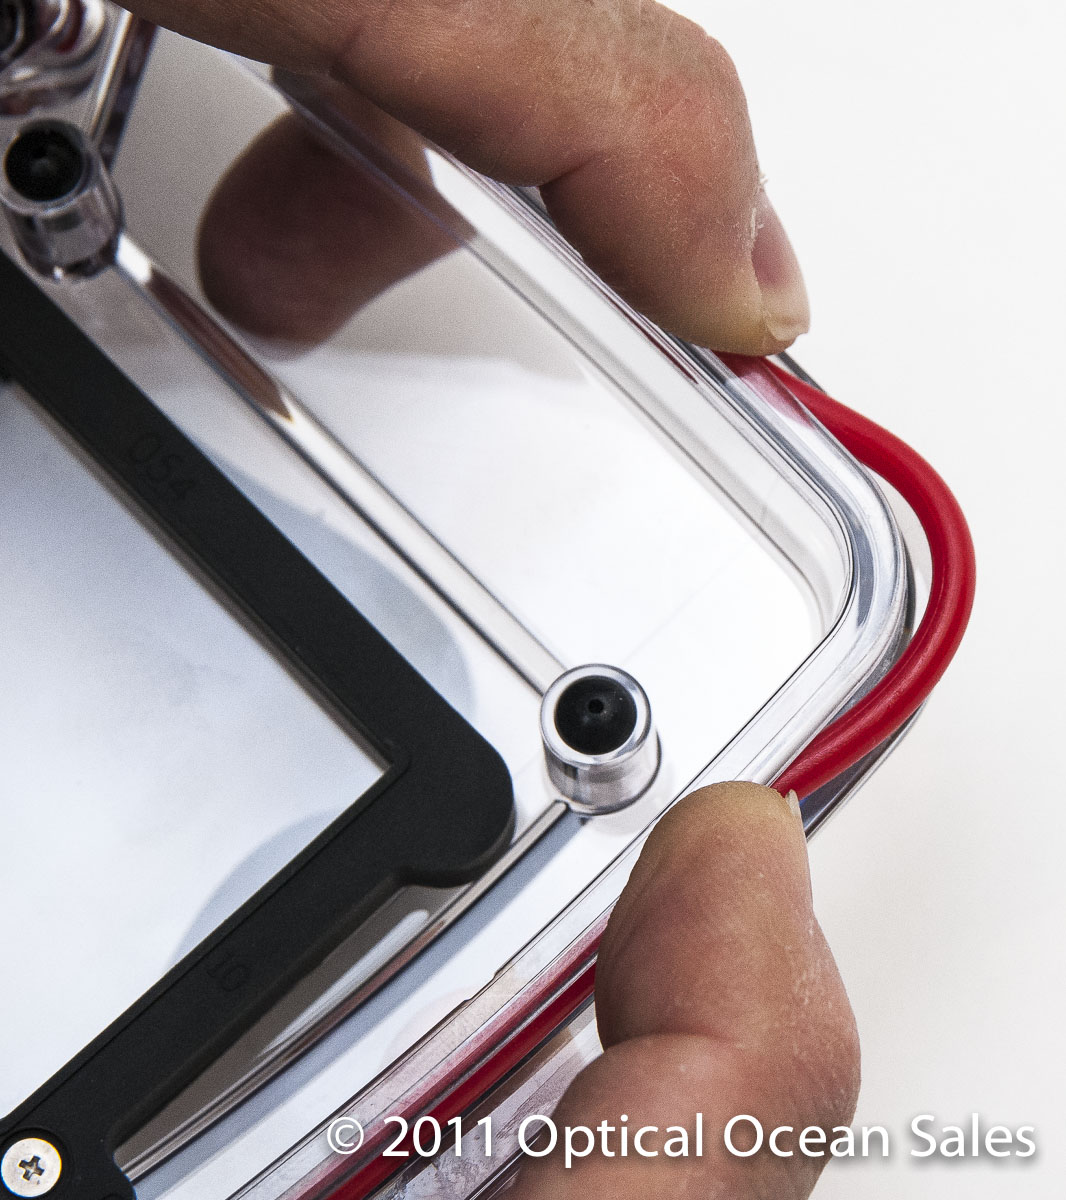 Following rule #1, you can generally service the rear, port and bulkhead o-rings as follows. Remove them carefully by pinching the o-ring at the corner and pulling it out/off. If it sticks, use the corner of a credit card to gently pry it up. Many housings come with a thin removal tool. A blunted wooden cuticle remover also can also be useful, but do NOT use tweezers, screwdrivers, needle-nose pliers, vise grips or any other sharp, medieval devices.
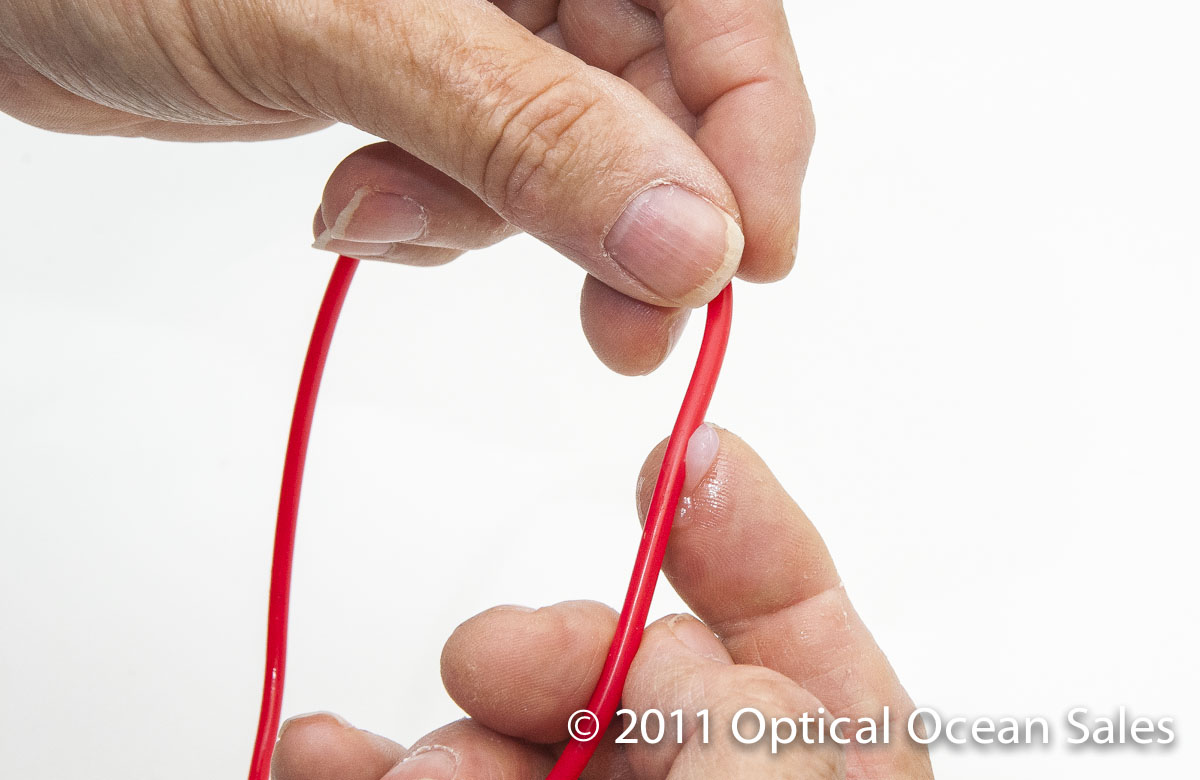
Then just wash the o-ring in warm water with a bit of soap. Pat it dry completely with a lint-free dishtowel; NOT a paper towel or used Kleenex. Try not to stretch it as you dry it.
Examine the o-ring in a bright light. Use a magnifying glass if necessary. Look for dirt, sand, cuts, dog, cat, rat, weasel or hamster hair. Be picky and meticulous; even the smallest hair can ruin your day.
O-rings can get cut or abraded fairly easily as salt crystals form and slice them with their sharp edges. Replace them from your spares as necessary, and order replacements.
You do have fresh spares don't you? O-rings need to be stored in an air-tight bag away from strong sunlight. Not a bad idea to pull them out of the housing when not in use and put them in a baggie inside. They get brittle with age, and should be periodically replaced.
 3) If an o-ring is clean and in good shape, lubricate it with just a drop or two of the proper silicone grease. Put a couple of drops on your fingertips and gently pull the o-ring through them to apply. Do NOT use anything other than the grease that is from your housing manufacturer. For instance, using black o-ring grease on blue o-rings has been known to melt them, which generally results in you melting down when your housing floods. Use the manufacturer’s grease on the manufacture’s o-ring; they will not cover floods if you don’t.
Now repeat the mantra; OMMM... "MORE IS NOT BETTER...MORE IS NOT BETTER...". Do NOT over grease. Silicone grease is ONLY a lubricant, NOT a sealant. All you want to see is sheen on the o-ring, not globs of grease. If you apply too much, all it will do is act as glue for sand and dirt to stick to.
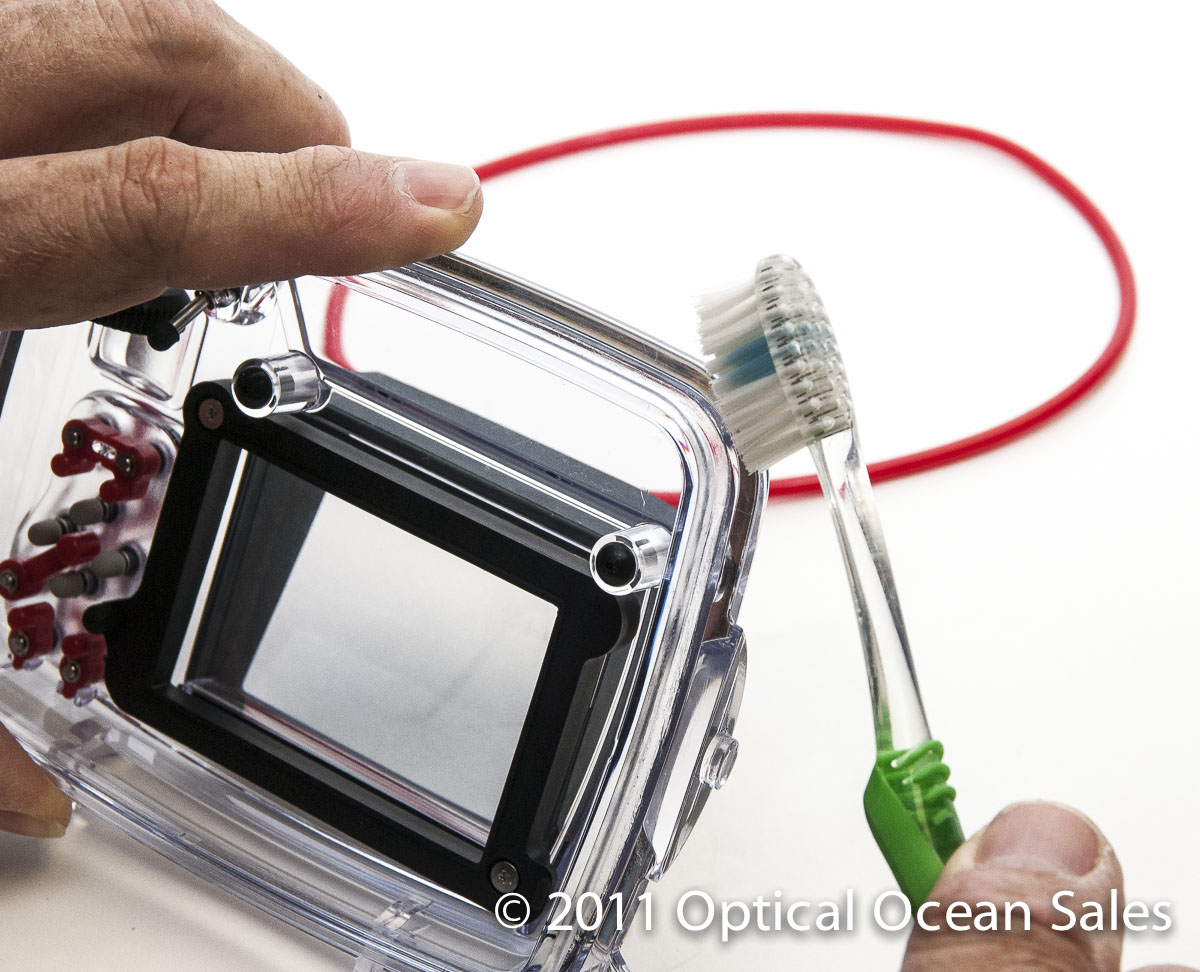 4) Carefully clean the flanges and grooves where they contact the o-rings. Use foam swabs, or a cotton swab with a piece of lens tissue wrapped around the tip. A clean used toothbrush also works well too. Blowing them off carefully with a can of compressed air is ok, but try to blow the dirt OUT of the housing, by holding it upside down. Again, examine all these surfaces carefully, they should not resemble "Beach Blanket Bingo" with sand everywhere, nor should there be any deep cuts or pinches that would result in a bad seal. Do NOT apply grease to the flat surfaces.
5) Now carefully install the clean, greased o-ring, making sure it is not twisted and lays flat in its intended spot. If it seems out of shape, let it sit there for a minute, then try pressing it into place again. They can get heated from your fingertips and become misshapen and enlarge slightly. With larger o-rings, start from the top with both hands and gently press them into place, without stretching them out of shape.
Examine the o-ring again, make sure there’s nothing that came off of a towel or your hands on them.
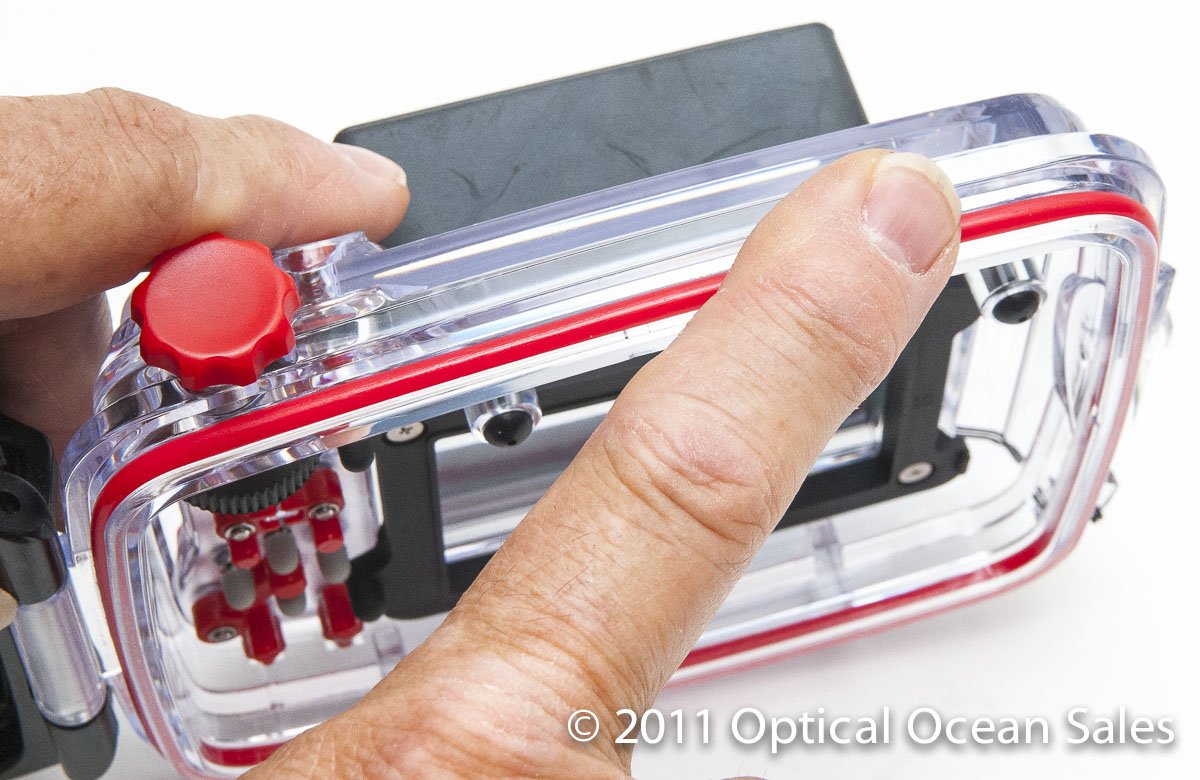 6) Install your camera with fresh batteries and a cleaned off card, then carefully close it. Always do an o-ring "sweep", running your finger along it's entire surface, just before you close the back.
Make sure the o-ring is seated and you haven’t pinched it out of position, and that there's not a sync cord or the edge of a silica gel bag stuck in between the surfaces. If you have a clear housing, check to see that there is a solid line where the o-ring seals. Breaks in color usually mean a problem.
Make sure the edges of the housing seem to be evenly spaced, and nothing looks out of position or warped.
7) If you have an electrical sync cord: Wipe off copper electronic sync cord contacts with rubbing alcohol (buy the 91% variety), and even use a bit of silicone grease on the threads when installing them. Then leave the cord connected for the whole trip. The contacts are fragile and if it's working, it does not need to be serviced between dives. Covers need to be immediately put on sync cord ends; copper and salt air is a bad combination.
8) Be sure to try your installed camera with the strobe before you go diving. Test a couple of frames to see if you’ve left the lens cover on, strobes are syncing, etc.
9) A piece of thin sanitary pad usually fits in most housings and provides a bit of "oops a few drops got in" insurance. It’s a good idea to tape it and any silica gel packets in place with a bit of electrical tape. It’s really a bummer to see the words “Dry-z-Air” when you are trying to focus on a whale shark.
10) Always test your housing in the dunk tank on the boat. That's a plunge, swish-swish, watch for bubbles, dunk...NOT a toss-it-in-until-I'm-ready-to-dive dunk.
11) Go diving! Have fun, swim around slowly, take lots of pictures!

12) Later soak the entire rig in warm fresh water, even if you’ve done it on the boat. 15-20 minutes is all you need to do. Again, work all the controls to get the salt out. Let it dry out of the sun and heat.
Disassemble handles from trays if you ever intend on moving them again. Salt water can act between dissimilar metals through electrolysis and weld them together; i.e. your stainless bonds to your aluminum handles.
If you're having some sticky controls, or something is "welded" together a warm bath with vinegar can help dissolve salt and corrosion safely. There is also a marine product called "Salt Away" that can work. If the part is small, you can put it in an ultrasonic cleaner.
Once a year or so, you should send your housing into the manufacturer's repair center for servicing. Those small o-rings in the controls generally are not user-serviceable and need periodic replacement. Springs, latches and controls get worn as well. Don't pack the housing and take it on a long trip without servicing the o-rings and checking the system on a test dive first.
The above doesn't have to take a long time, and a complete cleaning is not necessary every dive, but take your time and examine your housing carefully before you get in the water. Be meticulous about your equipment and it will last you for many years of diving!
Some General Dos and Don'ts:
Do:
- Be meticulous and careful when setting up your rig. Good time to tell your friends and family you need some alone time without distractions for an hour. Concentrate and develop a method for putting things together. Do it the same way every time and you won't forget a step.
- Use a dab of anti-seize compound, or even silicone grease, on any stainless to aluminum bolts. Most are anodized, but some anodizing is better than others.
- Clean, inspect and service your o-rings if in doubt. If you've been diving off a beach that's sandy or gritty, it's a good idea to be very careful. Off a boat or liveaboard your serviced o-rings can probably just be inspected carefully and continue to be used.
 Close your cover or port carefully. If something seems off, it usually is. A latch that's hard to close may mean something isn't loaded correctly. Rotary housing latches can be sand traps. If you've rinsed the housing and still find sand, then you may have to disassemble it. Usually it's just a small screw or two; clean it out and reassemble.
 - Always do an o-ring "sweep", running your finger along it's entire surface, just before you close the back. You'll feel any grit you missed.
- Always do a test of your camera and strobes. Make sure your settings are correct, go over anything you don't understand about their operations - while you can still look at the manuals.
- Always test your housing in the dunk tank on the boat. Better to find out there that you have a problem.
- Always do a test dive without the camera in the housing if you are worried there might be a problem. Go down to depth, and work the controls. Adding a small soft weight as a counter-balance is a help, as is a wad of tissue or paper towel inside to help spot where a leak is occurring.
- Consider getting one of the new "Vacuum Check" leak detection systems. These new systems allow you to pump a bit of air out of the housing and let it sit. If the pressure drops, then a light changes color to allow you to fix it or abort your dive - before a bad flood can occur!
- DON'T leave your camera in the rinse tank between dives, or for longer than a couple of minutes. MOST floods happen in the rinse tank. Cameras get dropped in on top of each other and latches get sprung, etc. Scratched ports are the least of your worries. Also, during your dive the housing and controls get compressed. Coming up from the bottom and then putting the camera in a non-pressurized tank of water can allow some controls to weep a bit. So just rinse it well, take it out and leave it under a towel out of the sun between dives.
- DON'T let anyone clean their mask out in the camera rinse tank. Anti-fog solutions have been known to be hard on o-rings.
- Never jump in the water holding your camera rig. The fast pressure can pop things open, along with it getting bumped and scratched. Including your head. Have a deckhand hand it to you, or suspend it from a line, then retrieve it once in the water.
- Dried salt water is your housing’s enemy. Salt crystals form in the controls and they can cause leaks. If you don't have access to a fresh water rinse, leave it in salt water. As long as it doesn't dry, it's fine.
- Try not to let water dry on the glass ports, especially in the sun. You'll get some cosmetic water spots on the port's coating if it does. There's nothing you can do to remove them once they're there. They won't hurt the photo quality at all, but it's nice to avoid them.
| Permalink | ![]()
![]()
 Why do I need a lighting system?